About a year ago I wrote a blog post on NHibernate performance tuning where I
mentioned Hilo as an option to increase your performance when doing bulk
inserts. A couple of weeks ago a colleague asked me about how Hilo in NHibernate
works. After explaining Hilo to him, I decided
About a year ago I wrote a blog post on NHibernate performance tuning where I mentioned Hilo as an option to increase your performance when doing bulk inserts. A couple of weeks ago a colleague asked me about how Hilo in NHibernate works. After explaining Hilo to him, I decided to write a blog post about it.
In this blog post I will discuss what Hilo is, when to use it, what the benefits are and what my personal experience is with Hilo in general. I created the following Github repository with a working code example. You can find repository here. Disclaimer: this is just demo code ;-)
What is Hilo?
Hilo is an algorithm that is used to generate identifiers. In NHibernate you have several id generation strategies and Hilo is one of them. An example of another strategy is Guid where you generate Guid as identifiers. I wrote about this in my performance post.
How does the Hilo algorithm work? The idea with Hilo is that the identifier is generated based on a "High" number and "Low" number. The "High" number is stored in your database and every time you need to generate new keys, NHibernate is going to ask what the "High" number is and will use the "High" number to generate an identifier by adding the "Low" number. The "Low" number is a range of numbers you define when you configure the Hilo for an entity. More on this later.
I can imagine that it sounds complicated so let me explain it with an example. Let's say that the "Low" number range is defined between 0 and 9999 and the current "High" number is 23 then the next identifier will be 240000. Why? Because when you look into the database you will see that the next "High" number will be 24 and your "Low" number range starts at 0000.
You must know that there are several scenarios when the "High" number goes up:
When a new SessionFactory is created
When the "Low" number range is maxed
Choosing the range of the "Low" number is important. If you have for instance a large number of inserts you will go for a wider range. When you have a small number of inserts go for a lower range. This will prevent gaps between identifiers, which is kind of odd to see. Remember that there is no "magic" number for the "Low" number range. It really depends on the amount of inserts.
How do I use it in NHibernate?
The first thing you need to do is decide how you are going to store the "High" number. In this example I am using a table for each entity. The example only has one entity, but you get my point.
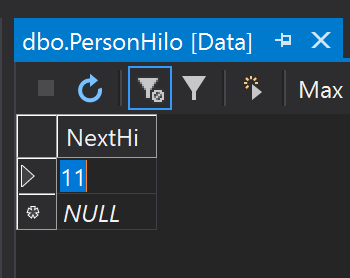
You will first need to create a table that will contain the next "High" number. The layout of this table (screenshot below) is just one column which contains the next "High" number.
When you choose this option you will create a "High" number table for each entity you want to use Hilo with. There are other options available but I won't discuss them in this blog post. Something to know is that I did use Fluent Nhibernate to configure NHibernate. If you don't know it, you should certainly check it out.
Now, let's go back to the code. In my example I only have an entity Person. This entity uses Hilo to generate the identifier. Below this paragraph you will see the code of the mapping class PersonMapping. A mapping class is where you map the properties of your entity to the columns of the corresponding table.
I am not going to explain the entire mapping because I think that the code explains itself. The most important part is line seven where I configure the Id column to use Hilo to generate the identifier. The "PersonHilo" argument is the name of the table where Nhibernate needs to look for the "High" number. The "NextHi" argument actually represents the name of the column which contains the actually next "High" number. The last argument "999" is the max value of the "low" number.
That's all! Of course you still need to configure the general NHibernate part, but for the Hilo part we are finished.
When do I need to use it?
That's a really good question. Hilo becomes a valid option when you want to insert bulk data into your database. In one of my previous posts I wrote about the different key strategies you can use and what the performance gains are. For example, the strategy where you let the database generate the ID is not such a good idea for bulk inserts.
What about your personal experience with Hilo? Well, I have been using Hilo for almost two years and I am happy with the result. As a team we made the choice to use a Hilo table for each entity that needed Hilo. We use Hilo for five or six entities. This creates a clear separation between the Hilo generation of the entities.
The performance improvement was huge for us. We went from 100 database calls to two database calls. One call to get the range and the second call to do the batch inserts. Important to know is that you have to use Hilo with the NHibernate batch inserts option. It's not recommended using it for tables where you do few inserts.
A word of caution when you are using Hilo. When you want to insert data directly into database you will need to calculate yourself what the range will be. This means that you need to augment the "High" number and then you need to calculate the "Low" numbers. This is something to take into consideration.
Summary
In this blog post I explained how to use the Hilo algorithm with NHibernate. While using Hilo is fairly easy it's important to understand the consequence. One situation is when you want to insert data by not using NHibernate. In situations like this you will need to manually calculated the identifiers. Finally I made a small list with pros and cons
Pro:
Improves performance when inserting bulk data
Easy to set up and use
Database independent. NHibernate does the identifier generation for you
Cons:
Inserting records without using Nhibernate is not straightforward
There can be gaps in your identifiers
That's all! I hope you enjoyed this introduction into NHibernate Hilo!